Baking a rich, velvety chocolate cake does not require a traditional oven or fancy bakery equipment. If you own a multi-functional rice cooker with a cake setting and a non-stick inner pot, you already possess the ultimate tool for incredible dessert creation. This streamlined approach delivers an exceptionally tender crumb, effortless cleanup, and consistent results every single time.
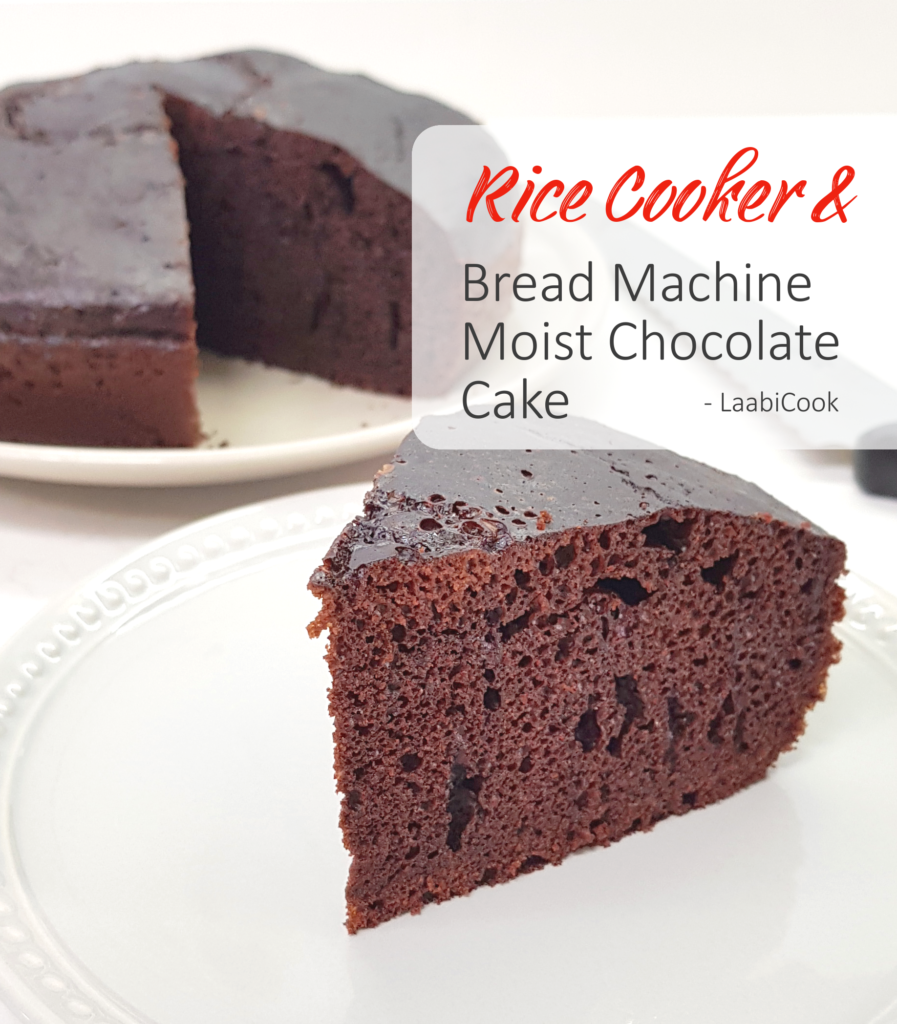
Many beginner cooks feel intimidated by oven temperatures, hot spots, and dry cakes. Rice cookers solve these problems by maintaining a gentle, enclosed, humid cooking environment. The result is a decadently dark, moist chocolate cake that cooks with push-button simplicity.
Why You’ll Love This Recipe
- Zero Oven Required: Keep your kitchen cool while enjoying fresh, hot homemade cake.
- Foolproof Moisture Retention: The sealed environment of a rice cooker traps steam, preventing the cake from drying out.
- Minimal Cleanup: Mix everything in two bowls and cook directly in the non-stick rice cooker pot.
- Beginner Friendly: Clear, simple instructions designed specifically for basic kitchen tools.
- Deep Cocoa Flavor: Enhanced with a touch of instant coffee to unlock maximum chocolate richness.
The Culinary Secrets Behind This Dish
To create a spectacular cake inside a countertop appliance, understanding a few simple food science principles helps tremendously.
1. Steam-Assisted Thermal Transfer
Traditional ovens rely on dry heat circulation, which can leach moisture from batter if timing is off by even a few minutes. A sealed rice cooker traps evaporating liquid from the evaporated milk and butter. This trapped moisture creates an ambient steam environment, allowing the cake to rise uniformly while remaining exceptionally tender.
2. Blooming Cocoa with Coffee
Adding a small amount of instant coffee powder does not make the cake taste like espresso. Instead, coffee compounds interact with the natural polyphenols in dark cocoa powder. This process blooms the chocolate flavor, amplifying its depth and masking potential bitterness without adding harsh acidic notes.
3. Gentle Leavening Balance
Because rice cookers produce moist heat, balancing baking soda and baking powder is vital. Baking soda reacts immediately with acidic cocoa to create initial air pockets, while baking powder provides sustained lift as thermal energy builds. This combination prevents the cake from becoming overly dense or gummy.
What You’ll Need
Equipment
- Multi-Functional Rice Cooker or Bread Machine: A rice cooker with a dedicated cake setting or standard cook cycle, or a bread machine with a bake setting.
- Two Mixing Bowls: One bowl for dry ingredients and one bowl for wet ingredients.
- Sifter or Fine-Mesh Strainer: Essential for breaking up flour and cocoa powder lumps before mixing.
- Whisk and Silicone Spatula: For whisking liquids and folding batter without overworking it.
- Wire Cooling Rack: For cooling of the pot after cooking.
Ingredients
Dry
- Plain Flour (100g): Standard all-purpose flour provides just enough gluten structure without making the cake tough.
- Cocoa Powder (50g): Choose high-quality unsweetened cocoa powder or Dutch-processed cocoa for deep color and rich taste.
- Sugar (90g to 180g): Use 90g for a dark, moderately sweet cake, or increase to 180g if you prefer classic bakery sweetness.
- Baking Soda & Baking Powder (1/2 tsp each): Ensure both are fresh for optimal rise.
- Instant Coffee Powder (1/2 tbsp): Optional, but strongly recommended to enhance chocolate depth.
Wet
- Eggs (2 large): Room temperature eggs emulsify much faster into the liquid ingredients.
- Butter or Oil (3/4 cup): Melted unsalted butter adds rich flavor, while neutral vegetable oil offers maximum soft crumb longevity.
- Evaporated Milk (200ml): Richer than whole milk, evaporated milk adds a velvety texture and subtle caramel note.
- Vanilla Extract (1 tsp): Adds aromatic balance to round out the rich cocoa.
Step-by-Step Cooking Guide
Step 1: Whisk the Dry Ingredients
- In a large, clean mixing bowl, sift together the plain flour, cocoa powder, baking soda, and baking powder. Sifting prevents lumps of cocoa powder from ruining the texture.
- Add the sugar and instant coffee powder, then whisk thoroughly until the mixture is uniform in color.
Step 2: Combine the Wet Ingredients
- In a separate medium bowl, beat the eggs. Pour in the softened melted butter (or oil), evaporated milk, and vanilla extract. Whisk gently until the liquids form a smooth, uniform emulsion.
Step 3: Mix Wet and Dry Components
- Slowly pour the wet mixture into the dry ingredients in two or three separate batches. Use a silicone spatula to fold the batter gently. Mix until no dry flour streaks remain. Do not overmix, as excess stirring develops gluten and makes the cake dense.
Step 4: Prepare and Pour into the Pot
- Lightly grease the inside of your rice cooker pot with a little oil or butter. Pour the chocolate cake batter into the pot. Tap the pot gently on the counter twice to release any trapped air bubbles.
Step 5: Cook on the Cake Setting
- Place the pot into the rice cooker. Close the lid, select the Cake setting, and start the cycle.
Step 6: Cool and Unmold
- When the cycle finishes, remove the inner pot from the cooker using heat-safe mitts. Place the pot on a wire rack or counter to cool undisturbed for at least 30 mins.
- Once cooled, gently run a flexible silicone spatula around the edges, place a plate over the pot, and invert it to release the cake.
Ingredient Substitutions & Variations
Cooking should be adaptable! If you’re missing a few items, here is how you can easily swap them out while keeping the same incredible flavor profile:
| Ingredient | Substitute | Ratio | Taste & Texture Impact |
| Plain Flour | Gluten-Free Flour Blend | 1:1 ratio | Slightly lighter texture; ensure blend has xanthan gum |
| Sugar | Coconut Sugar | 1:1 ratio | Adds a warm, caramel-like undertone |
| Butter or Oil | Melted Coconut Oil | 1:1 ratio | Subtle coconut aroma with very moist crumb |
| Evaporated Milk | Whole Milk & Cream | 100ml each | Equally rich flavor with soft texture |
Serving and Pairing Suggestions
- Serve this warm chocolate cake plain with a light dusting of powdered sugar for a minimalist presentation. For added indulgence, top with a scoop of vanilla bean ice cream or fresh raspberry sauce.
- Pair a warm slice with a cup of dark roast coffee, hot espresso, or a glass of cold milk. For an evening dessert, enjoy alongside a glass of Ruby Port or stout beer.
Storage, Reheating, and Freezing Guide
- Room Temperature: Store in an airtight container for up to 2 days in a cool spot.
- Refrigeration: Store tightly wrapped in plastic film for up to 5 days. Warm briefly in the microwave for 10 seconds to restore softness.
- Freezing: Wrap individual slices in parchment paper and aluminum foil. Freeze for up to 2 months. Thaw at room temperature for 1 hour before serving.
Frequently Asked Questions (FAQ)
▶ Why did my cake collapse after cooling?
Overmixing the batter introduces excess air that collapses as the cake cools. Mix wet and dry ingredients gently just until combined.
▶ Can I make this in a bread machine?
Yes, select the Bake setting on your bread machine and set the timer for 45 minutes after mixing the batter separately.
Rice Cooker Moist Chocolate Cake
Equipment
- Multi-Functional Rice Cooker With a dedicated cake setting.
- Two Mixing Bowls One bowl for dry ingredients and one bowl for wet ingredients.
- Sifter or Fine-Mesh Strainer Essential for breaking up flour and cocoa powder lumps before mixing.
- Whisk and Silicone Spatula For whisking liquids and folding batter without overworking it.
- Wire Cooling Rack For cooling of the pot after cooking.
Ingredients
Dry
- 100 g Plain Flour
- 50 g Cocoa Powder
- 90 g Sugar use 180g if you prefer sweeter
- ½ tsp Baking Soda
- ½ tsp Baking Powder
- ½ tbsp Instant Coffee Powder (optional)
Wet
- 2 Large Eggs
- ¾ cup Butter or Oil softened
- 200 ml Evaporated Milk
- 1 tsp Vanilla Extract
Instructions
Step 1: Whisk the Dry Ingredients
- In a large, clean mixing bowl, sift together the plain flour, cocoa powder, baking soda, and baking powder. Sifting prevents lumps of cocoa powder from ruining the texture.
- Add the sugar and instant coffee powder, then whisk thoroughly until the mixture is uniform in color.
Step 2: Combine the Wet Ingredients
- In a separate medium bowl, beat the eggs. Pour in the softened melted butter (or oil), evaporated milk, and vanilla extract. Whisk gently until the liquids form a smooth, uniform emulsion.
Step 3: Mix Wet and Dry Components
- Slowly pour the wet mixture into the dry ingredients in two or three separate batches. Use a silicone spatula to fold the batter gently. Mix until no dry flour streaks remain. Do not overmix, as excess stirring develops gluten and makes the cake dense.
Step 4: Prepare and Pour into the Pot
- Lightly grease the inside of your rice cooker pot with a little oil or butter. Pour the chocolate cake batter into the pot. Tap the pot gently on the counter twice to release any trapped air bubbles.
Step 5: Cook on the Cake Setting
- Place the pot into the rice cooker. Close the lid, select the Cake setting, and start the cycle.
Step 6: Cool and Unmold
- When the cycle finishes, remove the inner pot from the cooker using heat-safe mitts. Place the pot on a wire rack or counter to cool undisturbed for at least 30 mins.
- Once cooled, gently run a flexible silicone spatula around the edges, place a plate over the pot, and invert it to release the cake.
Video
Bread Machine Moist Chocolate Cake
Equipment
- Bread Machine with a bake setting.
- Wire Cooling Rack For cooling of the pot after cooking.
Ingredients
Dry
- 100 g Plain Flour
- 50 g Cocoa Powder
- 90 g Sugar use 180g if you prefer sweeter
- ½ tsp Baking Soda
- ½ tsp Baking Powder
- ½ tbsp Instant Coffee Powder (optional)
Wet
- 2 Large Eggs
- ¾ cup Butter or Oil softened
- 200 ml Evaporated Milk
- 1 tsp Vanilla Extract
Instructions
Step 1: Place the ingredients directly into the pot with the sequence below
- 2 eggs
- 3/4 cup butter or oil
- 90 to 180 g sugar
- 200 ml evaporated milk
- 1 tsp vanilla extract
- 1/2 tsp baking soda
- 1/2 tsp baking powder
- 100 g plain flour
- 50 g cocoa powder
- 1/2 tbsp instant coffee powder (optional)
Step 2: Cook on the Cake Setting
- Select the Cake setting on your bread machine.
Step 3: Cool and Unmold
- When the cycle finishes, remove the inner pot from the machine using heat-safe mitts. Place the pot on a wire rack or counter to cool undisturbed for at least 30 mins.
- Once cooled, gently run a flexible silicone spatula around the edges, place a plate over the pot, and invert it to release the cake.
Gobble these up too!
-

No gelatin, no fuss, no baking. This rose agar agar uses just 5 ingredients and…
-
Melt, mix, and press your way to crunchy chocolate stacks with just five pantry staples.…
-

A rustic open faced blueberry pie that requires no special pans or tools to make,…
-

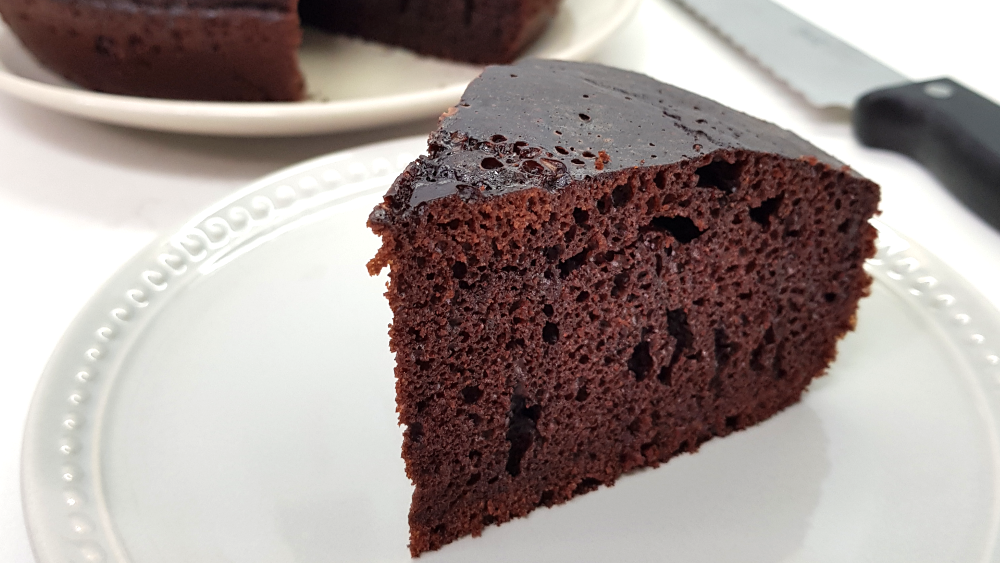
Baking a rich, velvety chocolate cake does not require a traditional oven or fancy bakery…