Pork lard, rendered pork fat used across Southeast Asian and Chinese home cooking, is what makes a bowl of plain rice suddenly worth eating. In Singapore, we call the crispy bits chu yao zha (猪油渣) and scatter them over everything from bak chor mee to steamed fish.
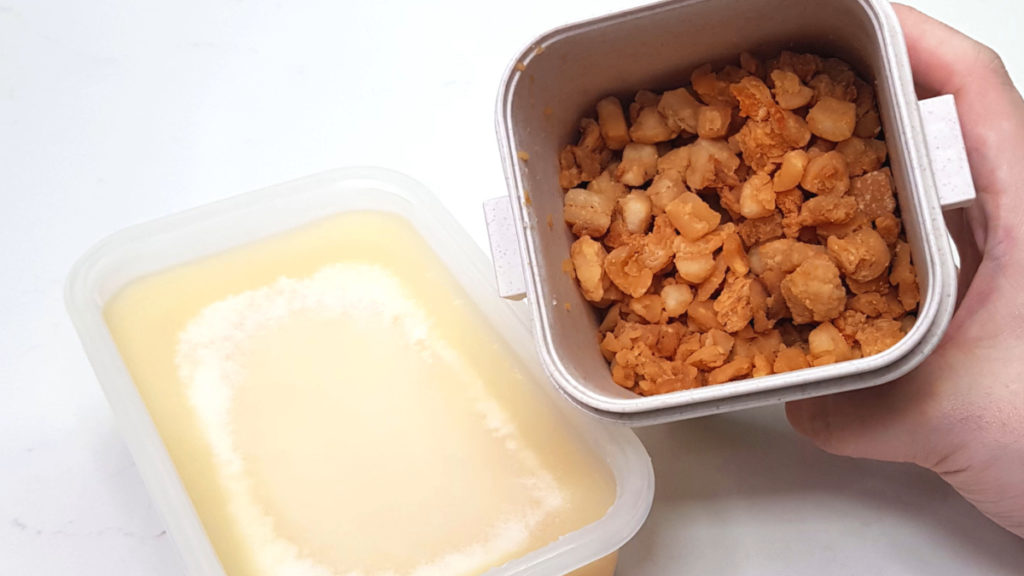
I learned to render pork lard from watching my grandmother do it every Chinese New Year. She never measured, just cut, boiled, and waited. The wet method I use now is slower than dry rendering, but the payoff is worth it: lard so neutral and pale you can use it for pie crusts, plus a batch of crispy pork lard to eat over rice. Mmmm… do you know that you can use pork lard for cooking and baking too? Pie crusts made with lard tend to be flakier than those made with butter.
Why You’ll Love This Recipe
- Two products, one batch: You get pure cooking lard and crispy pork lard in the same pot, nothing wasted.
- Minimal splatter and burning: The wet method keeps temperatures gentle and even, so you do not have to hover and stir constantly.
- Long storage life: Properly rendered lard keeps 9-10 months in the fridge, ready whenever you need it.
The Culinary Secrets Behind This Dish
Water is the control mechanism here. By starting pork fats submerged in liquid, you keep the temperature capped at 100°C until the water fully evaporates. This gentle phase renders fat slowly and evenly, preventing the hot spots that scorch dry-rendered lard and give it that smoky, brown tint. Once the water is gone, the temperature climbs and the fats fry in their own rendered lard: this is when the Maillard reaction kicks in, turning the solid bits golden and crisp.
The bubbling you watch for tells you exactly what stage you are in. Vigorous bubbling means water is still escaping; when it slows to a lazy sputter, the moisture is gone and the lard is nearly done. Keeping heat low throughout protects the smoke point you want for neutral cooking fat. Straining while hot would cloud the lard with fine particles, so letting it cool first lets gravity do the clarifying work for you.
What You’ll Need
Equipment
- Large pot: Pork fats foam as they render; you need headroom or it will overflow.
- Fine mesh strainer: Separates crispy bits from liquid lard without letting sediment through.
- Airtight container: Keeps lard from absorbing fridge odors and extends its 9-10 month shelf life.
Ingredients
- Pork fats, 500g: Leaf fat from around the kidneys gives the cleanest, most neutral lard.
- Water, to cover: Creates the wet rendering environment that prevents burning and splatter.
Step-by-Step Cooking Guide
1: Cut fats evenly
- Slice pork fats into similar-sized small pieces, about 2cm cubes. Uniform size means they cook at the same rate; uneven pieces leave you with some burnt bits and some undercooked.
2: Add water to cover
- Place fats in a large pot and add water just enough to submerge them. Too much water extends the evaporation time unnecessarily; too little risks dry pockets that scorch early.
3: Boil then simmer
- Bring to a full boil over medium-high heat, then drop to low. Stir occasionally to prevent sticking. You will see cloudy liquid and gentle movement; this is water and melted fat together.
4: Wait for the bubble change
- After 45-60 minutes, the water evaporates and rendering proper begins. The sound shifts from simmering to frying, with vigorous bubbling as the fats cook in their own lard. Keep heat low and stir every few minutes.
5: Strain the crispy bits
- When bubbling slows to almost nothing and the pork fats turn deep golden brown, they are done. Strain immediately: the crispy pork lard hardens as it cools and becomes difficult to separate if you wait.
6: Cool and filter the lard
- Let the liquid lard cool in the pot until warm but not hot, about 30 minutes. Pour through a strainer into your airtight container, leaving any browned sediment behind. The result is pale, neutral, and ready for anything.
Recipe Variations
| Variation | Description & Culinary Details |
| Dry-rendered lard | Skip the water and start fats in a dry pot over low heat. You get browner lard with a smoky flavor and lower smoke point, plus faster crispy bits. I prefer wet for versatility, but dry is traditional for certain savory applications. |
| Salted crispy pork lard | Toss the strained crispy bits with fine salt while still hot. The salt adheres to the residual oil and seasons every crunch. Eat over plain rice with a drizzle of dark soy sauce. |
Allergen Friendly Adjustments
- Gluten-Free: This recipe contains no gluten.
- Dairy-Free: This recipe contains no dairy.
- Nut-Free: This recipe contains no nuts.
Serving and Pairing Suggestions
- Side dish pairing: Plain steamed rice lets the crispy pork lard be the star, or toss through blanched bee hoon with dark soy and sesame oil.
- Baking application: Use your rendered lard in place of butter for pie crusts; the result is flakier and more savory.
Storage, Reheating, and Freezing Guide
- Refrigeration: Store liquid lard in an airtight container in the fridge for 9-10 months; it solidifies to a creamy white.
- Reheating: Scoop what you need and melt gently; do not microwave the whole jar or you risk hot spots.
- Freezing: Not recommended for the liquid lard; the texture can turn grainy. The 9-10 month fridge life is long enough.
- Crispy pork lard: Use within one week, stored airtight at room temperature or refrigerated; they lose their crunch to humidity quickly.
Frequently Asked Questions (FAQ)
▶ Where do I buy pork fats in Singapore?
Check the meat section of NTUC, Cold Storage, or Sheng Siong; look for packets labeled pork fat or leaf fat. If not stocked, ask the butcher at your wet market for chu you (猪油).
▶ Why is my lard brown instead of white?
You either used the dry method, or your heat was too high during the wet rendering.
▶ Can I render lard from bacon or smoked pork?
You can, but you will get strongly flavored fat that tastes of smoke and cure. Save that for frying eggs; do not use it for baking or neutral cooking.
▶ My crispy bits are chewy, not crunchy. What went wrong?
You strained too early, before all the water evaporated. Return them to the pot with a splash of water and continue rendering on low until bubbling stops completely.
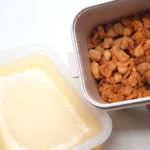
Pork Lard & Crispy Pork Lard
Ingredients
- Pork fats
- Water
Instructions
- Cut pork fats into similar-sized small pieces, so they will cook at the same time.
- Add pork fats into a large pot (if not it may overflow) and water just enough to cover the fat.
- Bring water to a boil, then turn heat to low and let it simmer. Stir occasionally.
- The actual rendering will start after the water has evaporated and you'll see a lot of bubbling (the pork fats are getting fried in it's own lard). Always keep the heat at low and stir occasionally.
- The pork fats will turn golden brown and crispy, and it is ready when you no longer see bubbling. Strain out the crispy pork lard.
- Let the lard cool in the pot, then filter to remove any bits while transferring it to an airtight container.
Video
Gobble these up too!
-

Cola and char siew sauce transform pork ribs into glossy, sticky perfection. No oven, no…
-
This homey Cantonese classic asks little of you and gives back so much. Let the…
-
This fried mee sua recipe brings together two Singapore classics: birthday noodles and hawker-style frying.…
-
This stir-fried lemongrass pork in chilled lettuce cups captures that balance with effortless elegance. Minced…