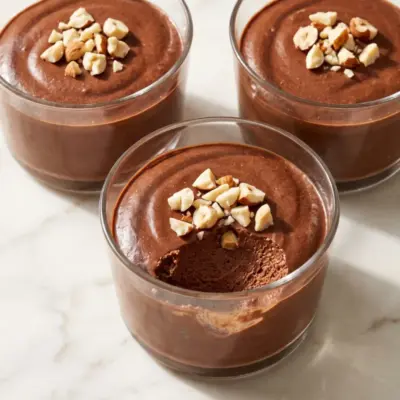
Guilt free chocolate mousse is a stovetop chocolate custard thickened with cornstarch instead of whipped cream, a lighter take on the French classic that my family asks for by name. It uses low-fat milk and just two egg yolks, so you get all the richness without the heavy cream or butter.
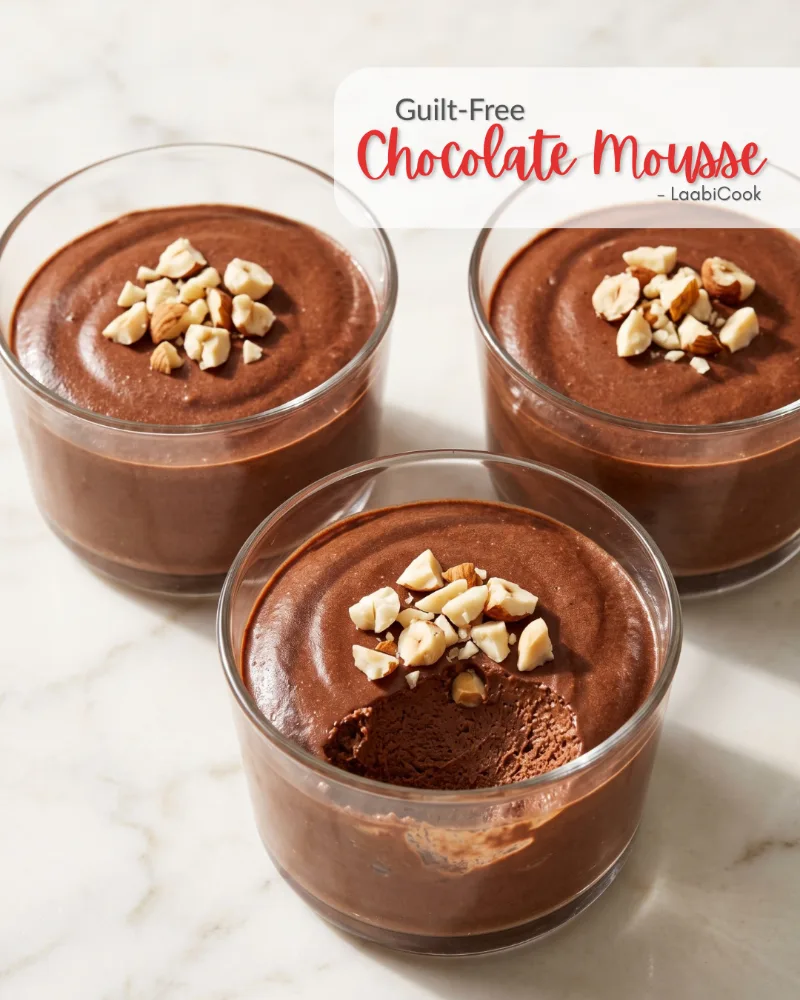
I make this when I want something chocolaty after dinner but cannot justify a pint of cream sitting in my fridge. Only 7 ingredients, one pan, and 20 minutes of your attention. Then the refrigerator does the rest.
Why You’ll Love This Recipe
- No cream, no butter: The cornstarch and egg yolks create a silky set without a single drop of heavy cream, so the calorie count stays reasonable.
- One pan only: Everything happens in a single saucepan; you will not be washing a mixer bowl or a double boiler.
- Make-ahead friendly: It needs at least 2 hours to chill, so you can make it in the morning and have dessert waiting after dinner.
The Culinary Secrets Behind This Dish
Cornstarch is doing the heavy lifting here. When you heat it in liquid, the starch granules absorb water and swell until they burst, releasing amylose and amylopectin that tangle into a gel network. This is starch gelatinisation, and it happens around 203F or 95C, which is why you wait for the first bubbles before moving on. The egg yolks add fat for mouthfeel and lecithin for emulsification, but they are not the primary thickener, so there is no risk of scrambling if you work quickly.
Tempering the yolks matters more than you might think. When you whisk that half cup of hot cocoa mixture into the yolks first, you raise their temperature gradually. Dump them straight into the pan and the proteins seize into grainy curds. The final minute over medium-low heat is insurance, it ensures the cornstarch hits full gelatinisation and the yolks are safely cooked through without boiling.
What You’ll Need
Equipment
- Heavy-bottomed saucepan: Distributes heat evenly so the cornstarch thickens without scorching on the base.
- Balloon whisk: Prevents lumps when you incorporate the cocoa powder and later the egg yolks.
- Heatproof serving bowl or cups: Holds the mousse for chilling; individual cups make for neater presentation.
Ingredients
Base
- Cocoa powder, ½ cup: Provides all the chocolate flavor; use Dutch-processed for a darker, smoother result.
- Cornstarch, 3 tablespoons: The sole thickener, creating that characteristic mousse set without cream.
- White sugar, ½ cup: Balances the bitterness of the cocoa; you can reduce slightly if you prefer.
- Salt, pinch: Amplifies the chocolate flavor; do not skip it.
Liquid and Finish
- Low-fat milk, 3 cups: The body of the mousse; whole milk works but adds more fat.
- Egg yolks, 2, whisked: Add richness and help emulsify; save the whites for another project.
- Vanilla essence, 1 teaspoon: Rounds out the chocolate; add it off heat so the alcohol does not cook off entirely.
- Chopped nuts, optional: Textural contrast; almonds or hazelnuts are traditional.
Step-by-Step Cooking Guide
1: Whisk dry ingredients
- Combine cocoa powder, cornstarch, sugar and salt in your pan. This prevents cornstarch lumps later.
2: Add milk gradually
- Pour in the low-fat milk slowly, whisking constantly, until you have a smooth, chocolate-colored liquid with no dry pockets.
3: Cook until thickened
- Place over medium-high heat and stir constantly for 4 to 5 minutes. The mixture will go from thin to noticeably thick and will start to bubble sluggishly. That bubble means the cornstarch has gelatinise. Remove from heat immediately.
4: Temper the yolks
- Scoop out ½ cup of the hot mixture and whisk it into your beaten egg yolks. This brings the yolks up to temperature without cooking them.
5: Combine and cook briefly
- Pour the yolk mixture back into the pan, whisking constantly. Return to medium-low heat for 1 minute, stirring the whole time. The texture should be glossy and coat the back of a spoon.
6: Add vanilla and chill
- Remove from heat and stir in the vanilla essence. Pour into your serving bowl or individual cups. Refrigerate for at least 2 hours until fully set and cold.
7: Serve
- Top with chopped nuts if you like. The mousse should hold its shape on a spoon but melt on the tongue.
Ingredient Substitutions & Variations
| Ingredient | Substitute | Taste & Texture Impact |
| Low-fat milk | Whole milk or 2% milk | Richer mouthfeel, slightly less guilt free. |
| Cornstarch | Arrowroot or tapioca starch | Arrowroot gives a silkier texture but can turn slimy if overcooked. Measure 1:1. |
| White sugar | Brown sugar or coconut sugar | Adds caramel notes that compete with the chocolate; color will be darker. |
| Egg yolks | 1 tablespoon additional cornstarch | The mousse sets firmer and lacks the egg’s richness and emulsification. Noticeably less luxurious. |
Recipe twists:
| Variation | Description & Culinary Details |
| Orange Chocolate Mousse | Add the finely grated zest of one orange to the dry ingredients, and swap the vanilla for ½ teaspoon orange extract. |
| Coffee Mousse | Dissolve 1 tablespoon instant espresso powder into the milk before adding to the pan; deepens the chocolate without tasting of coffee. |
| Spiced Mousse | Add ¼ teaspoon cinnamon and a pinch of cayenne to the dry ingredients for a Mexican hot chocolate profile. |
Allergen Friendly Adjustments
- Gluten-Free: This recipe is naturally gluten free; cornstarch is not a wheat product.
- Dairy-Free: Swap the low-fat milk for full-fat oat milk or soy milk; the set will be slightly softer.
- Nut-Free: Omit the chopped nut garnish; the base contains no nuts.
- Egg-Free: Replace the 2 egg yolks with 1 tablespoon additional cornstarch; texture will be firmer and less rich.
Serving and Pairing Suggestions
- Beverage pairing: A small glass of cold brew coffee or strong black tea cuts through the richness.
- Side pairing: Fresh raspberries or strawberries add acidity that makes the chocolate taste darker.
- Another side: Plain butter cookies or langue de chat for textural contrast.
Storage, Reheating, and Freezing Guide
- Refrigeration: Keeps covered for up to 3 days; the surface may darken slightly but the flavor is unchanged.
- Freezing: Not recommended; the cornstarch-thickened base turns spongy and weeps upon thawing.
- Reheating: This is a cold dessert; do not reheat or the set will break.
Frequently Asked Questions (FAQ)
▶ Why is my mousse grainy?
The egg yolks cooked too fast. Next time, temper more slowly and never let the mixture boil after adding yolks.
▶ Can I use chocolate bars instead of cocoa powder?
Not in this recipe. Melted chocolate would require re-balancing the liquid and cornstarch.
▶ How do I know when it is thick enough?
It should coat the back of a spoon and the first bubbles should appear; it will thicken more as it cools.
▶ Can I make this vegan?
Replace egg yolks with additional cornstarch and use oat milk; expect a firmer, less rich result.
Guilt-Free Chocolate Mousse
Equipment
- Pan
- Whisk
- serving bowl
- cups
Ingredients
- ½ cup cocoa powder
- 3 tbsps cornstarch
- ½ cup white sugar
- salt, Pinch of
- 3 cups low-fat milk
- 2 egg yolks, whisked
- 1 tsp vanilla essence
- Chopped nuts, optional
Instructions
- Combine cocoa powder with cornstarch, white sugar and salt in a pan. Gradually whisk in low-fat milk until evenly mixed. Place pan over medium-high fire, stirring constantly for 4 to 5 mins until mixture starts to bubble and thicken. Remove from stove.
- Whisk ½ cup of warm cocoa mixture into whisked egg yolks. Slowly whisk this into remaining warm cocoa mixture in pan.
- Place pan over medium-low fire and stir constantly for 1 min. Remove from fire and add vanilla essence. Pour mixture into a serving bowl or individual cups to set. Refrigerate for at least 2 hrs. Serve chilled and topped with nuts, if desired.
Gobble these up too!
-

A dense mud cake with dark chocolate, roasted hazelnuts, and glossy ganache. Only one pan… Cook recipe >
-
Dense, fudgy chocolate truffle cake made with just 7 ingredients. Water-baked for that perfect set.… Cook recipe >
-
Light chamomile tea meets sweet lychee in this wobbly Konniyaku jelly. Set it in the… Cook recipe >
-
My guilt-free chocolate mousse uses low-fat milk and zero cream. Pan, whisk, 20 minutes active… Cook recipe >