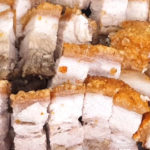
Roast pork belly is a classic Cantonese dish famous for its crispy crackling skin and the aromatic melt-in-your-mouth pork belly.

I’ve been wanting to try making my own roast pork for quite some time, my sister has been raving about the recipe that she has been using in Aussie. It did take me quite a few tries and adjustments to get to the flavor and juiciness that I wanted.
My parents and brother came over when I made this. They cleared every single piece and still ask for it every single time they come over, “You never make roast pork today?”
Parboiling, pricking holes and marinating
- Parboiling the pork belly for 5 to 8 mins helps seal in moisture and remove some of the undesirable meaty smell. Overcooking will shrink and distort the shape of the pork belly.
- Parboiling also makes it easier to handle the pork belly and to prick the skin with holes.
- Do prick as much holes as possible with anything that’s sharp; bamboo sticks, fork or meat tenderizer. There is no need for you to purchase a specific kitchen tool just for this recipe.
- Do not poke all the way through the fatty layer and into the meat layer, just through the skin will do. Otherwise the salt might seep through during baking, making it unpalatably salty.
- Cutting 1.5cm into the meat, not the skin before marinating enhances absorption of the marinade and flavor.
Drying and roasting
- Try to get a piece of pork belly of even thickness from the butcher, help with even cooking and the skin will crisp up with the same amount of time.
- A key factor in getting that crispy skin is leaving the skin exposed in the fridge for at least 6 hours (preferably overnight) so that the skin can dry out. Which also allows the marinade to penetrate into the meat.
- I did not use vinegar or baking soda, I’ve tried those methods but there is no detectable difference with the crispiness.
- Skewering the meat prevents it from curling and keeps the skin straighten during the roasting process. There’s no need to skewer if you half the recipe.
- Covering a layer of sea salt on the surface helps to absorb the moisture released in the first stage of the roasting, keeping the skin dry.
- You can use fine table salt too but it’s not as recommended as you may risk dropping the salt around the sides and it’s difficult to pick it back out, causing the meat to be salty.
- Adding water in roasting pan creates humidity inside the oven space, thus keeping the meat moist and tender.
Ps. I didn’t have to scrape the skin as I have never burnt it before. What a waste if I have to scrape it, I like it thick and crispy.
I know it seems like there’s a lot of steps but you’re just passively waiting for it to marinate and bake most of the time. So just plan ahead and prepare it the night before you sleep.
Chinese Crispy Roast Pork Belly
Equipment
- Pot
- Oven
Ingredients
- 1 kg pork belly skin on
- 6 slices ginger
- 2 tbsps Shaoxing huatiao wine
Marinade
- 1/4 cup soy sauce
- 1/3 cup Shaoxing huatiao wine
- 2 tbsps brown sugar
- 1 tsp five-spice powder
- 1 tsp salt
- 1 tsp white pepper
- 4 cloves garlic minced
For baking
- Sea salt to cover entire skin surface
- Room temperature water 3cm deep in roasting pan
Instructions
Parboil and pricking
- Place pork belly skin side down in a pot of water, add ginger and 2 tbsps of Shaoxing wine. Turn on heat and let it boil for 5 mins. Remove from pot, allow to cool.
- Use a sharp tool (bamboo stick, fork or meat tenderizer) to prick as much holes as possible on the skin without penetrating the fatty layer.
- Flip the pork belly over, make about 2cm wide and 1.5cm deep cuts in the flesh.
Marinate
- Mix well together in a box big enough to fit the pork belly: soy sauce, Shaoxing wine, brown sugar, five-spice powder, salt, pepper and minced garlic.
- Spoon the marinade inside the cuts. Then place pork belly flesh side down in marinade without marinating the skin.
Dry and chill
- Dap skin dry with kitchen towel.
- Leave in fridge uncovered for at least 6 hours or overnight.
After 6 hours or overnight
- Preheated oven to 180°C
- Remove pork belly from marinade, place skin side down. Insert 2 skewers crosswise through the meat to prevent it from curling. Dap skin dry with kitchen towel.
- Wrap with aluminum foil but leave the skin exposed
- Arrange wire rack on roasting pan and place pork belly on rack.
- Cover the entire skin surface with sea salt
Bake
- Place pork belly and pan oven, add 3cm of water in pan. Bake for 60 mins at 180°C.
- Take out the pork belly from the oven and preheat oven to 240°C.
- Remove salt crust and aluminum foil. Dap skin dry with kitchen towel
- Place pork belly back in oven. Bake at 240°C for 40 mins.
Carve & serve
- Allow pork belly to cool for at least 15 mins. Remove skewers and cut off the burnt parts of the pork belly.
- Carve it into bite-size pieces and serve with mustard, chili sauce or sugar.
Video
Notes
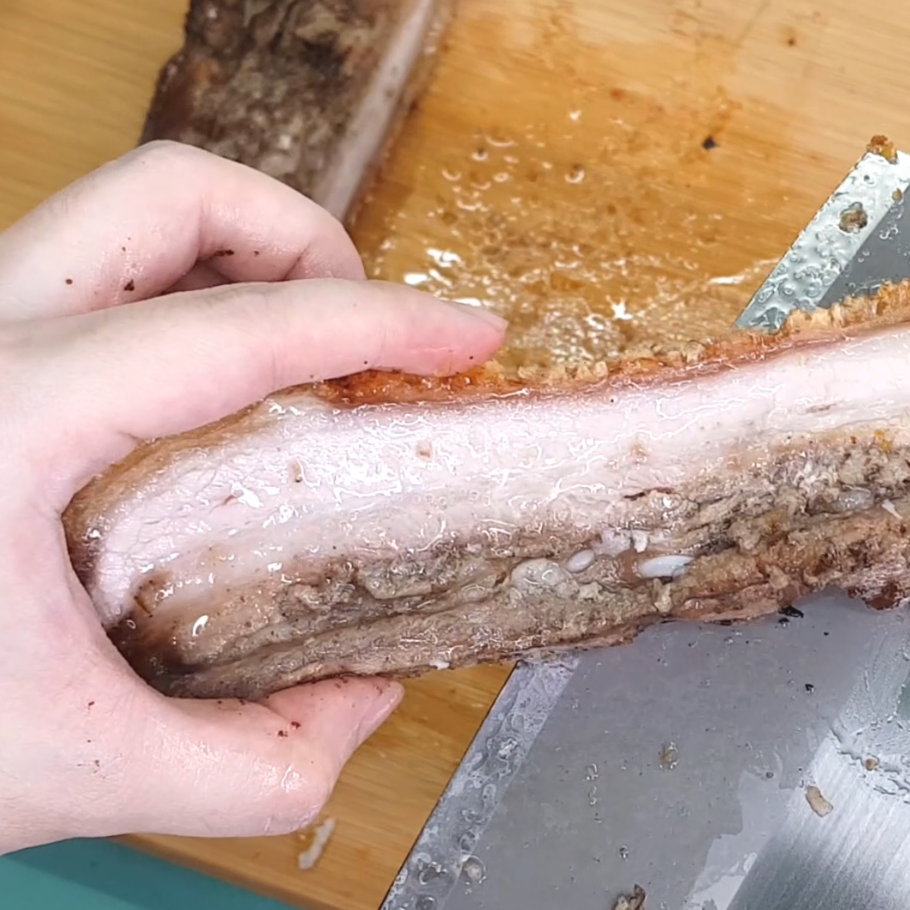
- When carving the pork belly, place skin side down. Cut the meat part first and then press the knife to break the crispy skin.
- Water in roasting pan helps to catch drippings from the pork belly during the second roast and makes it easier to clean.
- The oil drippings from the pork belly can be saved as pork lard if you can figure out how to. That’s another tutorial video for another day.
- If you have any leftovers, just store in the fridge and reheat until just warmed.
- Roast pork is also perfect when stir-fried with veggies!
Did you make this recipe?
Snap a photo and show me what you’ve made. 😉
Simply tag me @laabicook on Instagram and I’ll definitely stop by to take a peek!
Leave a Reply
You must be logged in to post a comment.